Pane Cafone (Country Man's Bread)

Pane Cafone (Country Man's Bread)

Monday, October 26, 2009

Russian Rye Starter

When I was up in Tallahassee at Betsy's, we stopped by New Leaf Whole Foods a local food co-op.  While I was there I figured I would go browse through the bulk food section and see what kind of flours they had.  I was hoping to find a nice hard red winter or maybe some spelt flour but what really caught my eye was whole rye for $0.99/lb.  I bagged up 5 lbs to take home.

I've had a dried Russian starter for awhile now but I havn't activated it since I've been wanting to make it a pure rye starter, getting fed only rye flour.  Now that I had the rye flour it was time to play.

I started the Russian starter by first soaking 1 tablespoon of it in warm water in a small jelly mason jar.  Think baby bottle wrist test warm.  After it softened up I started feeding it one tablespoon of rye flour.  The first two days of it's life it's feeding schedule was 1 tablespoon of warm water and rye flour twice a day, one in the morning while I was making coffee and once at night after I had all the dinner dishes done.  On day 3 I noticed regular bubbling forming on the top of the starter so I increased the feedings to 1/2 cup of each after moving the start to a 1 quart plastic container whose previous live was holding soup from a take out Chinese food place.  They make wonderful containers for left overs among other things.  I have one that I use for just for rising small batches of starter and I have the outside marked in 1 cup increments up to two cups.
I've heard that this Russian starter is very active, thus good for dark heavy breads, but I wasn't ready for what I was about to witness.  Verrrrrrry active stuff this Russian starter.  After I was sure it was nice and fed, I threw one cup in its new home and put it in the fridge to rest while I took off for a 4 day weekend of cycling and camping.
Monday on my return I pulled it out of the fridge and fed it 1/2 cup of rye flour and warm water in my marked feeding container.

12 o'clock


12:30 pm


1 o'clock


1:30 pm


As you can see in the pictures, it was about ready to overflow the container in less than 2 hours.

The recipe I plan to use is a New York Deli style with sauted onions in it.


New York Deli Rye 2


2 cups proofed sourdough starter
1/2 cup chopped onions
1 tablespoon olive oil
2 tablespoons butter
1/4 cup water
1 teaspoon salt
2 cups rye flour
1 cup white bread flour
You may add 2 T. caraway seeds, if you wish...I did


To proof your starter, feed it with equal parts of flour and water, cover
loosely and let it sit overnight or up to 12 hours (longer proof=sourer flavor).
At this point, measure out your 2 cups of starter into mixing bowl and proceed
with recipe.

Saute onions in olive oil until they become translucent.
Remove from heat and add butter, water and salt.
Cool to lukewarm (85 degrees F) and stir into starter.
Add the rye flour and mix well.

Getting ready to mix it all up


Add the white flour gradually, until it is too stiff to mix by hand. I used very little of the white flour just using it to flour the work surface.
Turn onto a floured surface and knead in enough remaining flour until dough is satiny. This is a very sticky dough.


Shape into an elongate loaf.  I shaped it as a round.


Place on baking sheet and let rise, covered, in a warm place for 1 to 2 hours,
or until about doubled in bulk (rising time will vary according to your starter,
but it takes longer than breads made with commercial yeast).

This dough didn't rise much


Preheat oven to 375 degrees F.
Make diagonal slashes in top of loaf with a razor blade or very sharp knife.
Bake for 40 to 50 minutes.

The finished product


I had a slice with the spaghetti dinner I cooked tonight and although the bread wasn't very tall it was still very soft and moist with a great crust.  The onion added a wonderful finishing flavor to it.  I plan to try this one again soon and try it in a pan to see what it does.

Stay tuned.

Thursday, October 15, 2009

From sweet to extra sour

I've been wanting some really extra sour, sourdough bread so I've been doing a little research on it and decided to give it a try.
I started with one tablespoon of SDI SF sourdough starter in a glass jar on the 5th of this month and I have been slowly building it up.  For the 1st week I was feeding it twice a day, once in the morning and once in the evening, 1 tablespoon (8 g) of all purpose flour and 2 teaspoons of warm water (10 g).
The beginning of second week I started doubling the amounts I fed it (2 tbl spoon of flour (16 g) & 4 tsp spoons (20 g) water.  On Wednesday morning of the second week I increased the amount again to 1/2 cup of each (65 g flour, 118 g water).

After the Wednesday morning feeding, week 2

I plan to feed it the same amount on Wednesday night and then on Thursday morning I plan to pour out half and continue feeding it 1/2 cups of flour and water.
Friday is baking day for this batch.  I plan to use Bob's Basic Sourdough Recipe to make the loaves.

On Friday I was scheduled to head out to Tallahassee to a friends house so I had to take the dough that I had made from the starter with me.  The dough was on it's initial rise and I was concerned that it would overflow the rising bucket before I could get to where I was going.  It did rise quite a bit more than I would have liked but, as it turned out, it didn't affect the final loaves.
Once I got to Betsy's house and got settled in for the weekend, I formed the loaves and put them in a couple of bread pans for the final rise.   I wish I would have taken some pictures of the finished loaves, they turned out beautiful.  Betsy has a wonderful new stove that seals up much tighter than my old stove and it really retained the moisture.  I had a custard cup of water on the bottom of the stove to cook.

The loaves turned out fantastic and we had them with a pasta dinner the following night and made french toast on Sunday morning with what was left of them.


Friday, October 9, 2009

Florida Friendship Bread?

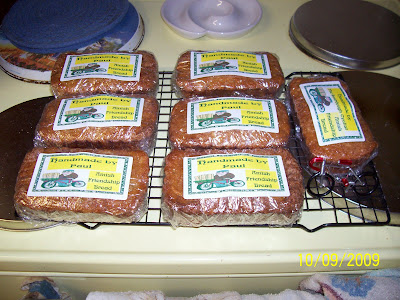
I've never seen any Amish in Florida but this latest batch of Amish Friendship Bread has a tropical Florida bent to it.  I have a night time 200K bike ride coming up this weekend so I thought I would make something for the other riders with a tropical flavor to take along for the ride.

I took the standard Amish Friendship Bread recipe and went just a little wild on it by adding 1/2c of shredded coconut,  3oz of macadamia nuts, 1/2 can of crushed pineapple and just when I thought I was done, I noticed 2 bananas on my counter top that looked like they had just a day or two of useful life left in them so they got smushed up and tossed in also.

Aloha


Instead of baking all this in 2 standard loaf pans, which would make serving a little more difficult on a bicycle, I opted to make individual loaves for everyone on the ride.
 Each loaf before baking was 260 g


A handful of tropical paradise


I split one of these with Ms Donna and she came back and told me that I don't need to be sharing these with anyone, and wanted to know where I put the rest of them.  I'll take that as a "yes these are pretty darn tastee" response.

Friday, October 2, 2009

Sourdough French Bread

With the success of the last loaf that I cooked in the dutch oven, I've decided to try my hand at a free formed french bread loaf or two.
The recipe/formula is simplicity in itself and comes from Richard Packham.  Being that this is a Richard Packham recipe it's only fair that I use the Richard Packham 1965 San Francisco Starter to make it.  I refreshed/fed a couple of starters earlier this week and his just happened to be one of them.  After renewing a cup and putting it in the fridge, I kept the remainder out on the counter and I have been feeding it a couple of times a day for the last 3 days so it is very active.  My last reduction and feeding of it left just enough active starter for this recipe.  Perfect.


Sourdough French Bread
by Richard Packham

  • 1 1/2 cups fresh starter
  • 1 cup lukewarm water (236 g)
  • 1/2 tablespoon salt (3 g) I increased to 1 tablespoon
  • 4 to 5 cups of flour
Mix all ingredients and knead well until dough is smooth and very stiff.  Let stand covered until double.  Shape into two round or oblong loaves.  I plan to make a pair of rounds.
Place on greased cookie sheets.  For this step I'm going to use my terra cotta baking tile.  Let rise until double in size.  Slash the tops with a very sharp knife.
Ready for the oven


Bake 35 minutes or until done at 425F.  During the first half of the baking time, spray the oven every ten minutes with water (or leave a pan of water in the oven while baking).  I actually use both sometimes but in this instance I plan to just put a pan of water on the bottom of the oven.

The finished products


Tuesday, September 29, 2009

Sharing is caring part deux

An old friend of mine contacted me on Facebook the other day and was wondering when he was going to get a chance to sample my home made sourdough.  He works crazy hours and I never know when his day's off are so we have kind of lost touch with each other the last year of so.
Well in honor of my friendship with Steve and his wife Charlotte I'm going to bake him a loaf of honey wheat bread using the SDI SF sourdough starter and I'm going to bake it in my cast iron dutch oven.
The recipe I'm going to use is Richard Packham's Everyday Sourdough Bread but I'm substituting honey where the recipe calls for sugar.

2 cups fresh starter
1 cup warm water
2 tablespoons sugar (honey)
1 teaspoon  salt
4 tablespoons dried milk powder
1 cup whole wheat flour
all purpose flour to make a stiff dough 4 - 5 cups

What's going to be interesting is that I have never used the cast iron dutch oven to bake bread in before so I'm going to have to be careful with the cooking time.  I plan to do the final rise in the dutch oven and put it into a pre-heated oven set at 400F and bake it for 40 minutes and see where that takes me.
First Rise and the Dutch oven


One other thing that I'm going to try is retarding the sencond rise by letting it rise in the fridge the second time.

In the dutch oven and ready for the 2nd rise


The Finished product. That is a big loaf of bread! 


I hope you enjoy this as much as I enjoyed making it Steve.

Monday, September 28, 2009

Sharing is Caring

My current passion with Sourdough bread goes back to my very roots growing up in the San Francisco Bay area.  Until I moved to Florida 19 years ago I just took it for granted.  Now 19 years removed from California I had to find a way to get my daily sourdough bread so I decided to make my own even though I had very little experience with bread making.  I mean how hard can it be?  Mankind has been making bread for thousands of years.
None of this would have been possible with out the generosity of people like The Friends of Carl who distribute Carl Griffiths 1847 Oregon Trail Starter for the price of a self addressee stamped envelope which is what I started with.  Carl's starter is very easy to work with and creates a nice mild loaf of sourdough bread.
Then I joined a Yahoo sourdough group and within a few months I was getting offers of different starters to expand my collection.  I had no idea that there were so many different types. My collection now consists of Carls 1847 starter, Sourdough International San Francisco Starter (my favorite, go figure), Richard Packhams 1965 San Francisco starter, Dr. G's Frankenstarter, which is an experiment of 7 starters combined, Amish Friendship bread starter and a Russian starter that I haven't activated yet and plan to make some rye bread out of.  That should be fun.
Paying it forward is the price I've been paying for the starters in my collection.  I have given starters to friends locally as well as sending them to people in Ohio, Calif., Maine, Arizona and Oregon.  Following The Friends of Carl's example, all I ask if someone wants one of the starters in my collection is $1 to cover postage, labels, envelopes etc..  I don't always have alot dried but I do try to keep a little of each on hand in case of emergencies, after all I do live in Florida and you never know when the power is going to go out.
My starters have probably drifted a little from their origins over time  so if you want a pure version of most of them then....

Here is a link to Dr. Woods website and the 12+ starters he offers for
sale.

http://www.sourdo.com/

I know most of us share starters, but keeping in mind the value Dr. Wood
brought to SD baking by collecting and maintaining pure cultues from
multiple sources, there is also a sense we should support him when
feasible.

Bob's Basic Sourdough Bread Recipe (revised)

I got this recipe off the Yahoo Sourdough Group. Barb in Ocala had posted the original and her revised version. I made two small changes to her revision. I used honey instead of sugar and I increased the amount of salt to 1 tablespoon.

BOB'S BASIC SOURDOUGH BREAD RECIPE(Revised)

Yield: 3 large loaves or 4 small loaves

INGREDIENTS:
Sugar 2/3 cup (222 grams) (I cut the sugar to 1/4 cup)
Vegetable oil - 1/2 cup (120 grams)
1 teaspoon salt (8 grams)
1 cup active starter (273 grams)
1-1/2 cups warm water (364 grams)
6 cups bread flour (810 grams)

I start with 5 cups of bread flour and then add the remaining cup as needed,
depending on the humidity.

Mix ingredients in a large bowl.

Grease or oil a container. (I use a clear, straight-sided plastic container)

 I picked 2 of these up at Walmart for less than $2.50


Put dough in container and flip over to cover top of dough with oil or grease.
Cover with a clean, damp cloth.

Let stand 6-8 hours or overnight.

This is after 4 hours


Punch down and divide into 3 parts. Knead each part 8-10 times on a lightly
floured surface.
Shape and put into 3 greased (I use a non-stick cooking spray) pans and brush
tops with oil (or butter).

Cover and let rise 4-5 hours. I put pans in a large plastic bag and tuck the
ends under the pans to make it airtight. Make sure you tent the bags.
Instead of plastic bags I use clear disposable shower caps that can be picked up at your favorite dollar discount store.  They normally come 10 for $1 

Bake at 325F to 350F for 30-35 minutes.
After baked, for a softer crust, brush tops with butter and cool on cooling
rack.
When cool, wrap in plastic cling wrap, then aluminum foil and freeze.

Friday, September 18, 2009

Care and Feeding day at the zoo.

When I was prepping to make Bob's Basic Sourdough Bread, I was going to use the Richard Packham 1965 San Francisco starter that I revived last month but never used.  The night before I was going to bake I put 1/2 cup of starter in a glass bowl and added 2 cups of flour and water and covered it with a towel.  When I checked it the next morning it had a layer of hooch on it but little to almost no activity.  Yikes!  I grabbed  SDI San Francisco sourdough starter and gave that a shot.  Okay, that one worked the way it was supposed to but it left me wondering about the health of the other starters in the fridge.  I took them all out and poured 1/2 cup of each in a container and added a cup of flour and water to each to see how they reacted.  The Frankenstarter (formally know as the starter from the black lagoon) seemed to be slow to react but otherwise okay.  The other 2 gave me cause for concern  by developing a layer of hooch early on with very little bubbling.  I keep dried back ups of all my starters but I'd rather try to bring the ones I already have running back to a healthy state.  My solution was to add a teaspoon of potato water to each starter and see if that perked them up.  Potato water is very simple to make. Take 2 or three potatoes and cut them up in cubes, cover with water and boil for about 20 minutes.  Pour off the water into a container and let it cool.  I put the glass mason jar I poured the potato water into a bowl of cool water so I could use it fairly soon.

The pot at the right contains the potato water


I have well water in my house that is rather hard so if the potato water does not do the trick then I plan to try and jump start them with a teaspoon of apple cider vinegar. I understand the little yeasties like a slightly acid environment.

Luckily I didn't have to resort to the vinegar, the potato water seemed to have worked.  Everyone is healthy and happy now.
Don't you just love a happy ending?

Thursday, September 10, 2009

Time to try out a new starter

With all the cycling I've been doing the last 6 days, I haven't had any time to bake.  Well there's a break in the action for the rest of the week so it's back to bread.
I have been able to activate a couple of starters this week, the Starter from the Black Lagoon and the David Packham 1965 SF starter.  I'll get back to the David Packham later, I want to try out this frankenstarter that Dr. G sent me.  I think I'll bake a couple of loaves of it and a couple of the Sourdough International San Francisco sourdough and bring one of each on a camping/cycling trip I'm taking this weekend and see which one my cycling friends prefer.
The recipe I plan to use is a Simple Sourdough Pan Bread
Hand Mixed with a Low Knead Procedure that I found online.

Ingredients
•   1 Cup Active Sourdough Culture
•   2 Cups Water
•   5 to 6 Cups Flour (divided)
•   1 Tablespoon Salt
Method
Make the sponge
Six to ten hours before making the dough, put one cup active starter into a bowl and add two cups of water and two cups of flour. Stir until reasonably smooth, cover and set aside. The time for this step will vary. Ideally, you would want to go to the next step when the sponge had reached peak activity. I just make the sponge before I go to bed at
night and make the dough the next morning when I get around to it. The timing is not critical. If the sponge looks active, it will be fine.
Make the dough
Stir one tablespoon of salt into the sponge. Add three cups of flour to the sponge one cup at a time. Stir to incorporate after each addition. I always stop at this point and judge the dough. With experience, you will know exactly how much additional flour is required.
Until you have enough experience, add flour 1/4 cup at a time until you have a medium dough. It will probably take two 1⁄4-cup additions. You will most likely have to give up your spoon or dough whisk and finish mixing the dough by hand. Cover the dough and let it rest for twenty to thirty minutes so the flour can absorb the water.
Knead the dough
Knead the dough for 15 to 20 seconds. I do this right in the bowl. Cover and let rest for 10 to 15 minutes. Repeat the short knead twice more for a total of three short kneads.
Cover the dough and let rise for one to two hours. It does not need to double, but it should definitely increase in volume by at least 50%. This will take longer in cool temperatures.
Stretch and fold
Dump the dough onto a lightly oiled or floured work surface. Gently stretch the dough into a rough rectangle about one third as high as the dough was when dumped on the counter. Fold the dough into thirds like a letter, and then fold the dough in thirds in the other direction. Round the lump of dough and put it in a clean, lightly oiled bowl, cover and let rise until fully doubled.
Shape the dough
Divide the dough into two equal pieces, round, cover, and let rest for 15 to 20 minutes.
Form the rounded dough into loaves to fit your bread pans. Place the dough into buttered bread pans, cover with oiled plastic wrap and set aside to rise.
Final rise
When the dough reaches the top of the pans remove the plastic and make your decorative expansion cuts on the top of the loaf. Place the pans in a covered container to finish the rise. I put the pans in a plastic grocery bag and close the top with a twist tie.
Bake the bread
When the bread is fully raised, place in a 375° F oven and bake until done - about 40 minutes. Cool before cutting.
Notes
The directions for making the dough call for adding flour and mixing to a medium dough.
The dough will become softer after the rest and the short knead steps. The end result is a soft and easy to handle dough.
Kneading. You can use conventional kneading if you wish. After mixing the dough, let it rest for 30 minutes, then knead until the dough is soft and supple. However why work that hard?
Bread flour will give a higher rise, but All Purpose Flour will work just fine. This recipe has been tested with a variety of flours and all have produced acceptable results.
Some taste testers preferred a little less salt. You might try 2 1⁄2 teaspoons and see if that suits your taste.
This is a simple bread, however it makes a great tasting loaf. I like it just as well as some bread that is made by more complicated procedures.
Turn this into a nice whole wheat bread by substituting 1 1⁄2 cups of whole wheat flour for an equal amount of white flour and add one tablespoon of honey and two tablespoons of molasses.

 First up on the baking schedule is going to be the Black Lagoon Starter.
I had a heck of a time getting this stuff to go active on me.  I fed it, poured out half, fed it again, poured out half and fed it one more time. It would start to get bubbly then go flat.  Finally on the last feeding I just scooped out a cup when it got bubbly and went from there.  It acted fairly normal from that point on which kind of surprised me.  It even rose about twice as fast as the San Francisco starter which was far more active and was being made at the same time today. The Black Lagoon Starter was an experiment of Dr. G's when he combined 7 different starters in one jar.  I don't know if he ever baked any bread with it.  I think I'll rename it Frankenstarter.
Here's the finished product fresh out of the oven.  It looks fairly harmless.
It came out very pale even though I had a pan of water on the bottom of the oven and I spritzed the walls about every 10-15 minutes.  I also baked it at 425F. I couldn't wait for it to cool so I cut off a slice and slathered some sweet cream butter on it to try it.  I found it to taste very mild and even a little floury. I'm not sure if that's due to the starter or technique but I'll find out soon enough.  I used the exact same recipe/formula for the SF sourdough that I baked shortly after it.

Here is the San Francisco Sourdough that just came out of the oven.
 
 As you can see, the color is darker on these loaves.  I don't know how they taste yet.  It's 2:30 in the morning and the taste test will just have to wait until breakfast.

Saturday, September 5, 2009

Some new things I'm trying

I'm always on the look out for a better or easier way to get things done.  Using a scale in my baking is, in my humble opinion, a better way to measure if you have the right scale.  I'm still searching for that one but I think I'm getting closer.
One of the other things I like to use in baking bread is a Pampered Chef 15" Pizza stone.  The only problem I have with the pizza stone is it's size.  I can only fit 2 pans of bread at a time on it and that can really slow me down when I have 5 loaves to bake.  Well while walking through Home Depot today to pick up some paint for a marking bike ride I was going on, I happened to notice a nice box of 18" x 18" x 1/2" unglazed terra cotta floor tile and instantly wondered how well one or two would fit in my oven.  As luck would have it, one of the tiles fits very nicely and I can fit all 5 of my bread pans on it.  Best of all it was only $1.77 per tile so for less than $5 I have a new, larger baking stone and a back up.  I've heard rumors of unglazed ceramic tiles containing lead and there is some debate back and forth on baking message boards about that but I don't recall hearing anything bad about terra cotta.  Just to be on the safe side though I plan to purchase a lead testing kit  and test the tile before I use it for anything.  I don't like extra ingredients in my bread if I can help it.

 
My bike schedule is such right now that I won't be able to do much in the way of baking until later next week so more through testing of the new scale and tile will have to wait for now.
Stay tuned.

Friday, September 4, 2009

Product review - Mainstays Digital Kitchen Scale

I wanted to be able to get more accurate with my dough so I picked up a Mainstays Digital Scale at Walmart which sells 2 different versions.  The small one pictured above for $19.95 and a larger one with a few more bells and whistles for $34.95. 
Being the frugal individual that I am, I thought I would try out the smaller of the two first and see if that fit my needs.  It has a ten pound capacity with a tare function that is great for weighting more than one item in a single bowl. It measures in imperial or metric weights.
What I found in using the scale for a couple of weeks though is that it is not sensitive enough for some recipes.  When weighing out small quantities of a gram or two it may or may not registar until you hit a larger amount which can be a real problem when your trying to measure baking soda or baking powder into a dough.  I also found the auto shut off feature really annoying since there is no way to turn that feature off.  If you spend more than 30 seconds looking at the recipe you will return to a blank display screen.  It also shuts itself off if you pour the ingredients too slowly into the bowl.  Grrrrrr.

Final verdict:  No deal, I took it back and traded up for it's bigger brother.  I'll let you know in a couple of weeks how it works out.

Tuesday, September 1, 2009

My sourdough baking is about to get more interesting

A new friend, Dr. G, on the Yahoo sourdough group I belong to sent me some starters to try. 
  1. Richard Packham San Francisco sourdough starter circa 1965
  2. Russian starter from Sourdough International
  3. Black Lagoon (insert scary music here)
  4. 1847 Oregon Trail starter ( I already have some of this but it's always good to have a spare back up.

Some of these sound real interesting such at "Black Lagoon" which is a combination of 7 different starters.   Who knows what it's going to turn out like.  Sounds like a good batch to try for Halloween.

I decided to activate the Black Lagoon 1st and so far it's activating just fine.  I added one tablespoon of dried starter to one tablespoon each of flour and warm water and let it sit on the counter over night to soften up. This morning I started the feeding process and it's starting to come out of hibernation nicely.  
It, it, it's alive!!

Monday, August 31, 2009

San Francisco Sourdough Batch 03

After my last experiment in sourdough baking, I decided to try it again except this time with the corrections in place before I start.  I had to do some scrambling late in the process last time and I wasn't comfortable with that.  The loaves still turned out good but I still feel there's room for a little improvement.   I'm going to use the scale from start to finish. That includes building the starter from 1 tablespoon up to one cup.

The afternoon starts with getting the starter going.  For this I am once again using one Tablespoon or 16 g of starter and building it slowly.  The first feeding consists of the the starter, 4.5 g of flour and 7.5 g of water.  My scale doesn't do anything less than a full gram so I rounded up to the nearest gram.
The second feeding was 9 g of flour and 15 grams of water.
The 3rd feeding will be 18 g of flour and 30 g of water.
the 4th and last feeding will be 36 g of flour and 60 g of water for a total of 197 g of starter.

Ready to go

The corrections I put in place on this version were to increase the amount of water to 2 cups instead of 1 1/2 cups to bring the hydration up to 55% and I doubled the amount of salt from 1 1/2 tsp to 1 tablespoon to bring the salt content up to 2%.  I'm hoping the tweaks to the recipe will make a moister loaf with more tang and bigger holes.  I plan to work on the crumb and crust also but I'll get to those as things progress.

Update: The corrections I put in this recipe turned out to be a disaster.  More to the point, 2 cups of water was way too much and I think I messed up on building the starter by waiting too long after the last feeding before using it.  This batch did not rise at all and it appeared way too wet, I wound up tossing the entire mix in the thrash.  I need to revisit my methodology and formula on this one.
I guess I should expect this kind of set back once in a while.  Sourdough ain't rocket science but one can over complicate it real easy.

Friday, August 28, 2009

The crack cocaine of the Sourdough World

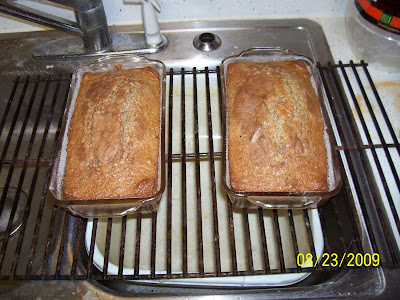
It starts off innocuously enough with a friend giving you a slice of some really wonderfully moist, sweet cake that's shaped like a loaf of bread and asks you if you would like some starter to make your own.  With a big ol innocent smile on their face, they slide a gallon zip lock bag across the table with this yellow goo inside and a sheet of instructions on how to care for your new addiction, starter.  I'm thrilled at first singing the praises of this wonderful new desert bread that I've added to my collection of starters.  What I didn't know at that time is that it would alienate me from all my friends, destroy my marriage and cause me to sell all my worldly possessions just to feed it's ever growing appetite.  Okay so maybe I exaggerated just a little but my friends are a still leary of me when they see me coming with a paper bag in my hand.

The name of this new addiction is Amish Friendship Bread.  Someone must have really ticked off the Amish at some point.  This, I think, is their revenge.

Every batch of bread produces 2 really fantastic tasting loaves and 4 starters.  One to keep for your next fix and 3 to hook your friends on.  The ultimate gift that keeps on giving.

One of the beauties of this stuff is the endless variations to the recipe.  I've made it with every kind of nut I have available in the pantry. (Present company excluded)  You can use virtually any kind of pudding mix in it, and it's almost impossible to make a bad loaf.

My only real problem with this stuff is what to do with all the extra starters it produces.  While talking to my pusher friend that first turned me on to it, I came up with a plan that I think may work.  When I made my last batch I kept one starter out on the counter and rolled up the other 3 bags and threw them in the freezer. The instructions say you should never refrigerate it but it doesn't say anything about freezing.  From what I've been told and read, freezing will not harm the little yeasties in it.  That provided a solution to the immediate problem at the time but I had to find a long term solution.  I took a look at the recipe and cut all the feeding ingredients by 1/4 for the day six feeding and the final meal before baking day.  My plan is to wait for this bag to mature and bake a couple of loaves without generating any extra starters.  Before the withdrawal symptoms get too bad I'll thaw out a frozen starter and use that until I get down to my last baggie of sourdough crack Amish Friendship Bread.  Once I reach the last bag, I'll feed it using the original quantities to start the cycle of addiction all over again.
This is how it all begins:
 
My latest couple of loaves:
I added pecans, nutmeg and applesauce to them.

 
I have this pan that I've been dying to use so instead of making 2 loaves, I just dumped it in to one pan and got artsy.  I believe this was my 1st attempt using chocolate pudding.
 

Monday, August 24, 2009

San Francisco Sourdough Batch 02

Let's go really sour this time.
For this batch I'm only going to start with 1 tablespoon of starter and slowly  build it up to 1 cup over a series of days.  The object is an extra sour cup of starter.
The 1st feeding was 1 Tbsp of starter & 1 1/2 tsp each of flour and water.
In the 1st picture I have just given the starter it's 2nd feeding at 8am.  1 Tbsp each of flour and water.  The little sourdough yeasties are pleased with the offering. I plan to feed it every 12 hours, doubling quantities, until I've reached one cup of starter.
                             
                              3 hours after the last feeding  

For the purposes of this of this experiment I am going to be using weight instead of volume to measure once the starter is ready.  I've seen varying measures of what a cup of flour should weigh but 130g/cup is what I'm going to go with.  The beauty of experimenting with sourdough is getting to eat all the results.

Here is the recipe/formula I will be using:

San Francisco Sourdough French Bread 2
 
1 1/2 cups warm water - 354 g - (changed to 2 cups)***
1 cup Sourdough starter - I started with 1T of starter and built it up to one cup over a few days.  Approx. 240 g
4 cups of unsifted all purpose flour - 520 g
1 1/2 tsp sea salt - 9 g - (should be 1 Tablespoon)***
1/2 to 1 Tsp baking Soda - 2.5 to 5 g
Combine water, starter, 4 cups of flour and salt in a glass bowl.  Mix well, cover lightly with a towel folded into several thicknesses and let stand at room temperature for approximately 18 to 24 hours or until the dough has doubled in size.

Mixed and ready to rise and shine.

To make the loaf:
2 to 2 1/2 more cups flour - 260-325 g
Mix 1 cup of the remaining flour with 1/2 tsp of the baking soda and stir this into the risen dough until it is very stiff.  Turn the dough out into a floured board and knead approximately 1 more cup of flour into it.  knead it for 5 to 10 minutes or until the dough is smooth.
Shape into 2 long loaves or 1 large round loaf, place on a lightly greased baking sheet, cover with a damp cloth and let stand in a warm place for 3 to 4 hours or until almost doubled in size.


Although these loaves may look very "wet" that is actually just the Pam I sprayed them with so they wouldn't stick to the plastic covers. 
 
You may wish to sprinkle cornmeal on the greased baking sheet or line it with kitchen parchment before placing the bread on it.
Preheat oven to 425F
Brush a little water on top of the loaves and make a few diagonal slits across the top with a sharp knife.

 The tops were very soft and difficult to slash with out deflating the loaves
Place a shallow pan of water in the bottom of the oven and spritz the oven walls every 10 minutes with a spray bottle.
Bake for approximately 40 to 45 minutes at 400-425F or until the crust is a medium dark brown.
 The finished product

Very nice texture and the star of the show, the new scale.


Notes:
  • This dough rose very fast (8 hours).
  • ***When I got into the math of this recipe, after spending a couple of hours learning all the math involved, I noticed that the hydration was only 41% so I added an extra 1/2 cup of water to bring it up to 55%.  I also noticed that the salt was only 1% but it was too late to do anything about that by the time I noticed. 
  • The tutorial I used for bakers percentage: Wild Yeast blog - Baker's Percentage Tutorials
  • My flour usage was very close to what's called for in the recipe/formula.  I only had to use a little extra to keep the dough from sticking to my hands and the board while I was kneading, maybe an extra 25 g.
  • There was little to no oven spring on these loaves.
  • I was pleasantly surprised at how nice and airy these loaves turned out.
  • After tweaking, this recipe is a keeper for the flavor and tangyness it produces.  Very light and tangy. 
  • Cost per loaf - $0.37  Where can you buy a loaf of SF sourdough bread for that???

Sunday, August 23, 2009

San Francisco Sourdough Batch 01

Tomorrow is my 1st attempt at a 5 loaf batch of SF sourdough bread.  I've only used this starter once and that was a free form loaf that didn't quite turn out the way I envisioned.

This batch is made using the following recipe from Richard Packham:


EVERYDAY SOURDOUGH BREAD (for five loaves)

The night before baking, mix in a very large bowl a batter made of:

       2 cups sourdough starter
       4 cups lukewarm water
       5 cups flour

Mix well, although there may still be small lumps.  Cover lightly
and leave overnight at room temperature. 
                    Here's what it looks like at this stage: 6:30PM
 
The next morning, stir
down the batter and return 2 cups to your permanent sourdough
container. 
                This is what it looked like at 8:00 am this morning. 
                                       Nice and frothy.
 
Add:
       
       3 cups lukewarm water
       1/4 cup sugar ( I did not use any sugar in this recipe)
        1 tablespoon salt (I use sea salt)
       1 cup powdered milk
       1/4 cup margarine or butter, melted and cooled (1/2 stick)
       or vegetable oil ( I used melted sweet cream butter)
        flour (white, whole wheat, or a combination 
        thereof; up to 10% other flours may be used)

Stir in about 5 cups of flour and beat well.  Add about 5 or 6 more
cups gradually, until too stiff to stir, then turn out and knead
well, adding flour as necessary until the dough is smooth and
stands about 1/3 as high as it is wide when resting, or more. 
Place in a greased bowl, let rise until double.
 
                              My rising bowl, a 18 qt plastic pan: 
                                   The dough she be a rising:
 
Punch down, let rest 15 minutes.  Shape into 5 loaves, place in 
greased bread pans (9 x 5 x 3). 
 
                                3 of the 5 loaves doing their
                                   final rise before baking. 
 
Brush tops with 1 tablespoon melted margarine or butter.  (I omit 
this step) 
Let rise until tops are almost even with top edge of pan. (once the 
dough has risen to just over the top of the pans, I put 3 diagonal 
slashes on the top of each loaf)  
Bake 45 minutes at 375.  (I normally bake at 425F for 40 minutes with 
a pan of water on the bottom of the oven and spritz the oven walls 
every 15 minutes with a spray bottle)
                                                       Slashed and ready to burn 
 
  Turn out immediately onto racks.  For a soft crust, 
rub with hard butter or margarine while still hot.  Freeze in plastic
bags when cool.
 
                                                      The finished product.  


Notes: 
  • This batch is too big to mix in the kitchen aide so it all has to be done by hand.
  • I sifted all the flour. 
  • I got quite a bit of oven spring on this batch.  When I put the loaves in the oven they were at the top of the pans.  When I pulled them out they were a good inch or two above the top.
  • Total kneading time was about 5 minutes.