Pane Cafone (Country Man's Bread)

Pane Cafone (Country Man's Bread)

Monday, August 31, 2009

San Francisco Sourdough Batch 03

After my last experiment in sourdough baking, I decided to try it again except this time with the corrections in place before I start.  I had to do some scrambling late in the process last time and I wasn't comfortable with that.  The loaves still turned out good but I still feel there's room for a little improvement.   I'm going to use the scale from start to finish. That includes building the starter from 1 tablespoon up to one cup.

The afternoon starts with getting the starter going.  For this I am once again using one Tablespoon or 16 g of starter and building it slowly.  The first feeding consists of the the starter, 4.5 g of flour and 7.5 g of water.  My scale doesn't do anything less than a full gram so I rounded up to the nearest gram.
The second feeding was 9 g of flour and 15 grams of water.
The 3rd feeding will be 18 g of flour and 30 g of water.
the 4th and last feeding will be 36 g of flour and 60 g of water for a total of 197 g of starter.

Ready to go

The corrections I put in place on this version were to increase the amount of water to 2 cups instead of 1 1/2 cups to bring the hydration up to 55% and I doubled the amount of salt from 1 1/2 tsp to 1 tablespoon to bring the salt content up to 2%.  I'm hoping the tweaks to the recipe will make a moister loaf with more tang and bigger holes.  I plan to work on the crumb and crust also but I'll get to those as things progress.

Update: The corrections I put in this recipe turned out to be a disaster.  More to the point, 2 cups of water was way too much and I think I messed up on building the starter by waiting too long after the last feeding before using it.  This batch did not rise at all and it appeared way too wet, I wound up tossing the entire mix in the thrash.  I need to revisit my methodology and formula on this one.
I guess I should expect this kind of set back once in a while.  Sourdough ain't rocket science but one can over complicate it real easy.

Friday, August 28, 2009

The crack cocaine of the Sourdough World

It starts off innocuously enough with a friend giving you a slice of some really wonderfully moist, sweet cake that's shaped like a loaf of bread and asks you if you would like some starter to make your own.  With a big ol innocent smile on their face, they slide a gallon zip lock bag across the table with this yellow goo inside and a sheet of instructions on how to care for your new addiction, starter.  I'm thrilled at first singing the praises of this wonderful new desert bread that I've added to my collection of starters.  What I didn't know at that time is that it would alienate me from all my friends, destroy my marriage and cause me to sell all my worldly possessions just to feed it's ever growing appetite.  Okay so maybe I exaggerated just a little but my friends are a still leary of me when they see me coming with a paper bag in my hand.

The name of this new addiction is Amish Friendship Bread.  Someone must have really ticked off the Amish at some point.  This, I think, is their revenge.

Every batch of bread produces 2 really fantastic tasting loaves and 4 starters.  One to keep for your next fix and 3 to hook your friends on.  The ultimate gift that keeps on giving.

One of the beauties of this stuff is the endless variations to the recipe.  I've made it with every kind of nut I have available in the pantry. (Present company excluded)  You can use virtually any kind of pudding mix in it, and it's almost impossible to make a bad loaf.

My only real problem with this stuff is what to do with all the extra starters it produces.  While talking to my pusher friend that first turned me on to it, I came up with a plan that I think may work.  When I made my last batch I kept one starter out on the counter and rolled up the other 3 bags and threw them in the freezer. The instructions say you should never refrigerate it but it doesn't say anything about freezing.  From what I've been told and read, freezing will not harm the little yeasties in it.  That provided a solution to the immediate problem at the time but I had to find a long term solution.  I took a look at the recipe and cut all the feeding ingredients by 1/4 for the day six feeding and the final meal before baking day.  My plan is to wait for this bag to mature and bake a couple of loaves without generating any extra starters.  Before the withdrawal symptoms get too bad I'll thaw out a frozen starter and use that until I get down to my last baggie of sourdough crack Amish Friendship Bread.  Once I reach the last bag, I'll feed it using the original quantities to start the cycle of addiction all over again.
This is how it all begins:
 
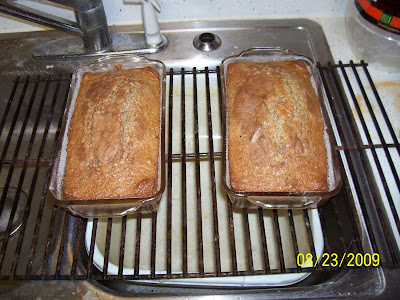
My latest couple of loaves:
I added pecans, nutmeg and applesauce to them.

 
I have this pan that I've been dying to use so instead of making 2 loaves, I just dumped it in to one pan and got artsy.  I believe this was my 1st attempt using chocolate pudding.
 

Monday, August 24, 2009

San Francisco Sourdough Batch 02

Let's go really sour this time.
For this batch I'm only going to start with 1 tablespoon of starter and slowly  build it up to 1 cup over a series of days.  The object is an extra sour cup of starter.
The 1st feeding was 1 Tbsp of starter & 1 1/2 tsp each of flour and water.
In the 1st picture I have just given the starter it's 2nd feeding at 8am.  1 Tbsp each of flour and water.  The little sourdough yeasties are pleased with the offering. I plan to feed it every 12 hours, doubling quantities, until I've reached one cup of starter.
                             
                              3 hours after the last feeding  

For the purposes of this of this experiment I am going to be using weight instead of volume to measure once the starter is ready.  I've seen varying measures of what a cup of flour should weigh but 130g/cup is what I'm going to go with.  The beauty of experimenting with sourdough is getting to eat all the results.

Here is the recipe/formula I will be using:

San Francisco Sourdough French Bread 2
 
1 1/2 cups warm water - 354 g - (changed to 2 cups)***
1 cup Sourdough starter - I started with 1T of starter and built it up to one cup over a few days.  Approx. 240 g
4 cups of unsifted all purpose flour - 520 g
1 1/2 tsp sea salt - 9 g - (should be 1 Tablespoon)***
1/2 to 1 Tsp baking Soda - 2.5 to 5 g
Combine water, starter, 4 cups of flour and salt in a glass bowl.  Mix well, cover lightly with a towel folded into several thicknesses and let stand at room temperature for approximately 18 to 24 hours or until the dough has doubled in size.

Mixed and ready to rise and shine.

To make the loaf:
2 to 2 1/2 more cups flour - 260-325 g
Mix 1 cup of the remaining flour with 1/2 tsp of the baking soda and stir this into the risen dough until it is very stiff.  Turn the dough out into a floured board and knead approximately 1 more cup of flour into it.  knead it for 5 to 10 minutes or until the dough is smooth.
Shape into 2 long loaves or 1 large round loaf, place on a lightly greased baking sheet, cover with a damp cloth and let stand in a warm place for 3 to 4 hours or until almost doubled in size.


Although these loaves may look very "wet" that is actually just the Pam I sprayed them with so they wouldn't stick to the plastic covers. 
 
You may wish to sprinkle cornmeal on the greased baking sheet or line it with kitchen parchment before placing the bread on it.
Preheat oven to 425F
Brush a little water on top of the loaves and make a few diagonal slits across the top with a sharp knife.

 The tops were very soft and difficult to slash with out deflating the loaves
Place a shallow pan of water in the bottom of the oven and spritz the oven walls every 10 minutes with a spray bottle.
Bake for approximately 40 to 45 minutes at 400-425F or until the crust is a medium dark brown.
 The finished product

Very nice texture and the star of the show, the new scale.


Notes:
  • This dough rose very fast (8 hours).
  • ***When I got into the math of this recipe, after spending a couple of hours learning all the math involved, I noticed that the hydration was only 41% so I added an extra 1/2 cup of water to bring it up to 55%.  I also noticed that the salt was only 1% but it was too late to do anything about that by the time I noticed. 
  • The tutorial I used for bakers percentage: Wild Yeast blog - Baker's Percentage Tutorials
  • My flour usage was very close to what's called for in the recipe/formula.  I only had to use a little extra to keep the dough from sticking to my hands and the board while I was kneading, maybe an extra 25 g.
  • There was little to no oven spring on these loaves.
  • I was pleasantly surprised at how nice and airy these loaves turned out.
  • After tweaking, this recipe is a keeper for the flavor and tangyness it produces.  Very light and tangy. 
  • Cost per loaf - $0.37  Where can you buy a loaf of SF sourdough bread for that???

Sunday, August 23, 2009

San Francisco Sourdough Batch 01

Tomorrow is my 1st attempt at a 5 loaf batch of SF sourdough bread.  I've only used this starter once and that was a free form loaf that didn't quite turn out the way I envisioned.

This batch is made using the following recipe from Richard Packham:


EVERYDAY SOURDOUGH BREAD (for five loaves)

The night before baking, mix in a very large bowl a batter made of:

       2 cups sourdough starter
       4 cups lukewarm water
       5 cups flour

Mix well, although there may still be small lumps.  Cover lightly
and leave overnight at room temperature. 
                    Here's what it looks like at this stage: 6:30PM
 
The next morning, stir
down the batter and return 2 cups to your permanent sourdough
container. 
                This is what it looked like at 8:00 am this morning. 
                                       Nice and frothy.
 
Add:
       
       3 cups lukewarm water
       1/4 cup sugar ( I did not use any sugar in this recipe)
        1 tablespoon salt (I use sea salt)
       1 cup powdered milk
       1/4 cup margarine or butter, melted and cooled (1/2 stick)
       or vegetable oil ( I used melted sweet cream butter)
        flour (white, whole wheat, or a combination 
        thereof; up to 10% other flours may be used)

Stir in about 5 cups of flour and beat well.  Add about 5 or 6 more
cups gradually, until too stiff to stir, then turn out and knead
well, adding flour as necessary until the dough is smooth and
stands about 1/3 as high as it is wide when resting, or more. 
Place in a greased bowl, let rise until double.
 
                              My rising bowl, a 18 qt plastic pan: 
                                   The dough she be a rising:
 
Punch down, let rest 15 minutes.  Shape into 5 loaves, place in 
greased bread pans (9 x 5 x 3). 
 
                                3 of the 5 loaves doing their
                                   final rise before baking. 
 
Brush tops with 1 tablespoon melted margarine or butter.  (I omit 
this step) 
Let rise until tops are almost even with top edge of pan. (once the 
dough has risen to just over the top of the pans, I put 3 diagonal 
slashes on the top of each loaf)  
Bake 45 minutes at 375.  (I normally bake at 425F for 40 minutes with 
a pan of water on the bottom of the oven and spritz the oven walls 
every 15 minutes with a spray bottle)
                                                       Slashed and ready to burn 
 
  Turn out immediately onto racks.  For a soft crust, 
rub with hard butter or margarine while still hot.  Freeze in plastic
bags when cool.
 
                                                      The finished product.  


Notes: 
  • This batch is too big to mix in the kitchen aide so it all has to be done by hand.
  • I sifted all the flour. 
  • I got quite a bit of oven spring on this batch.  When I put the loaves in the oven they were at the top of the pans.  When I pulled them out they were a good inch or two above the top.
  • Total kneading time was about 5 minutes.